
 Cal. No. E81*
 Refine your search
E81*
Reference position
Checking and correcting the reference position
If the time or calendar is not shown correctly, check whether the current reference position is correct.
- Reference position is the base position of all hands and calendar to properly indicate the various functions of this watch.
- If the hands and indication do not reflect the correct reference position, the time and calendar will not be indicated accurately.
Caution
Be sure to check the current reference position
and adjust it only when the position is not correct.
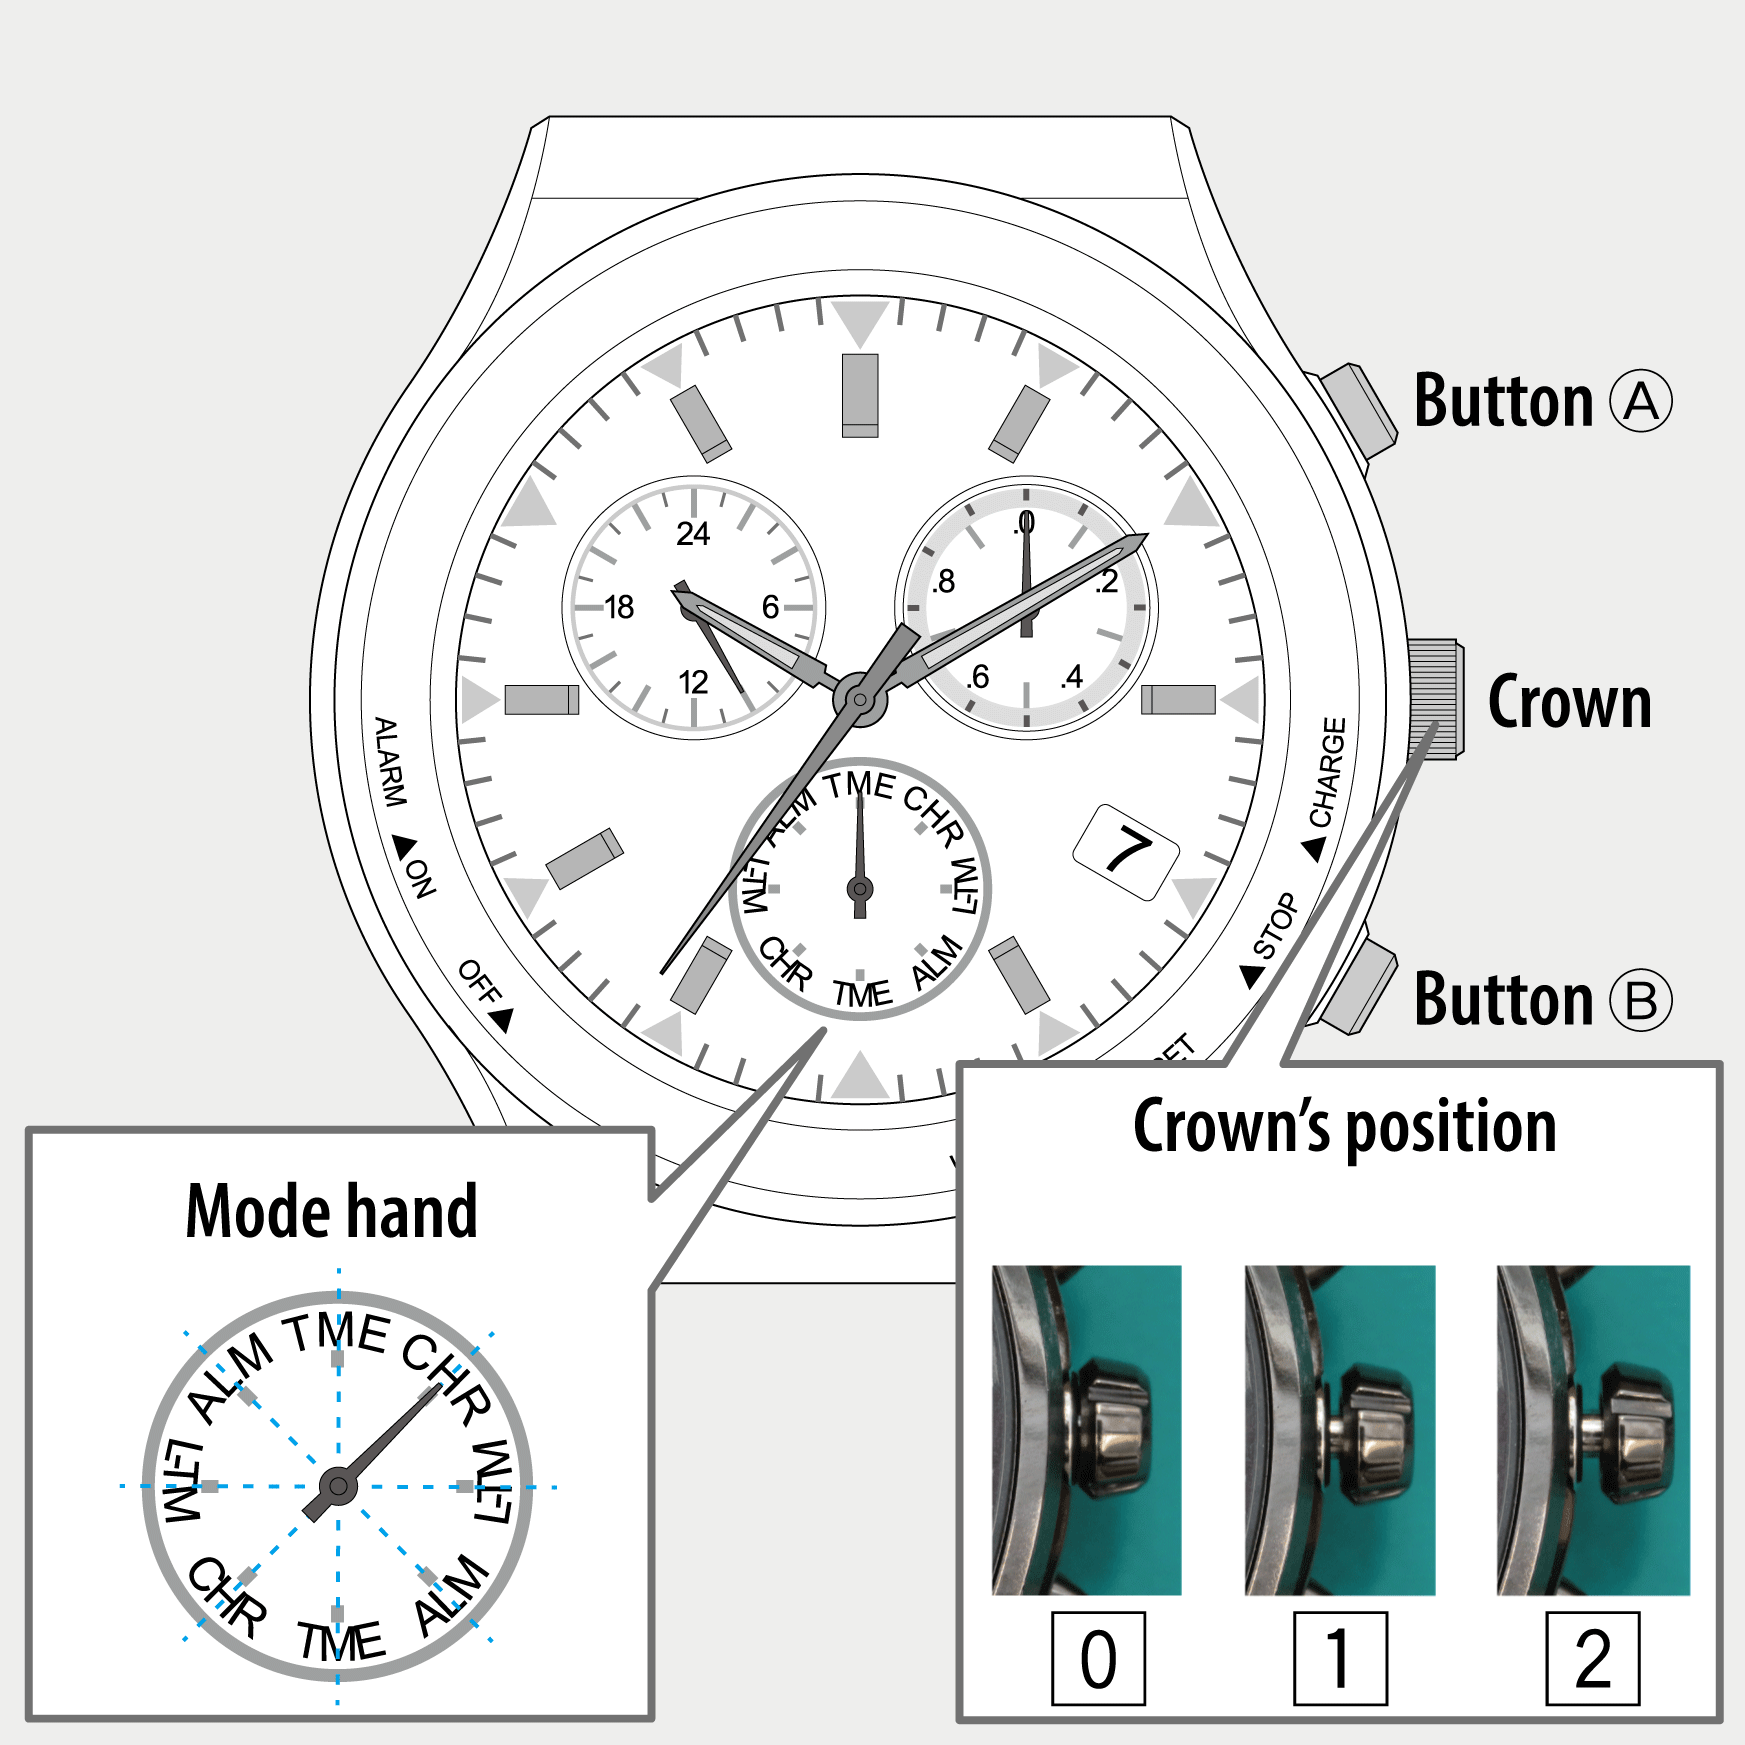
- Push the crown in to position 0.
- Rotate the crown to set the mode hand to [CHR].
- Pull the crown out to position 1.
- Checking the reference position
- Rotate the crown to correct the reference position of the function hand and date indication.
- Pull the crown out to position 2.
- Rotate the crown to correct the reference position of the hour, minute and 24-hour hands.
- Press the upper right button A repeatedly to make the second hand indicate the correct reference position.
- Push the crown in to position 0.
- Rotate the crown to set the mode hand to [TME].
!
Turn the crown so that the mode hand will point to the center of the mode indication securely.
The hands and indication move to their current reference position.
!
Proceed to the next step when the hands and indication stop.
!
After the hands and indication stopped, check whether they are at correct positions referring to the figure below.
The reference position must be corrected if any one of the positions is incorrect.
Correct reference positions
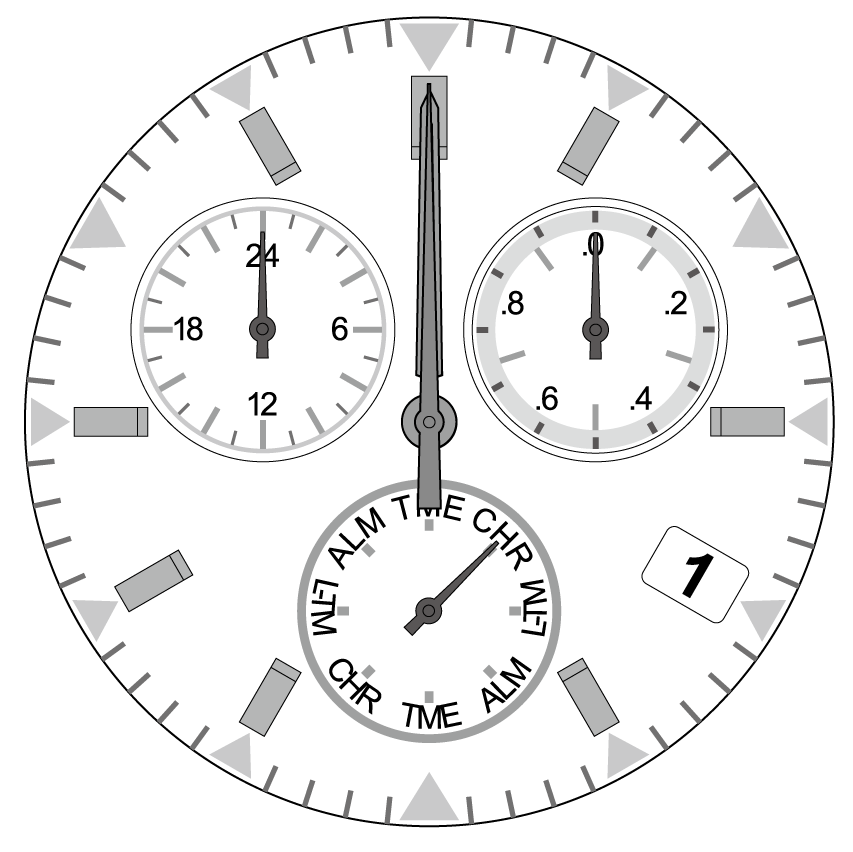
Hour, minute and second hands: 0 hour 00 minute 0 second
24-hour hand: “24”
Function hand: “0” (just upright)
Date indication: “1”
| Correct | No adjustment is required. Push the crown in to position 0 to finish the procedure. Set the mode to [TME] after that. |
|---|---|
| Wrong | Click here to proceed below. |
!
The function hand moves synchronously with the date indication.
!
When the date indication changes from “31” to “1” and the function hand points “0” at first, they are at the correct reference position.
!
When you rotate the crown quickly a few times, the hand/indication will move continuously.
To stop the rapid movement, rotate the crown in either direction.
!
When you rotate the crown quickly a few times, the hand/indication will move continuously.
To stop the rapid movement, rotate the crown in either direction.
!
Adjustment of the reference position is finished.
!
Turn the crown so that the mode hand will point to the center of the mode indication securely.
Adjust the time and calendar after that.